Part 4: The Pre-ferment
 So your starter is refreshed and ready to go – it’s vigorous and full of life.
For a Saturday bake, I took the starter out on the Thursday night and sat it on the bench at room temperature. After an hour or so I fed it 100 grams water and 70 grams of white flour and left it at room temperature (remember we’re looking for a pancake batter consistency).
On Friday morning I woke up and fed it again, 100 grams water and 70 grams flour, and off to work I went, hoping it would be ripe and ready for that evening.
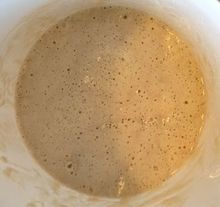
On Friday night, with quite a volume of starter by now, and lots of bubbles and a lovely fruity smell we made the ‘pre-ferment’; this is the stage before you make the final dough that you’ll bake.
It ends up being a wet sponge like mousse that will be added to flour and water, which then needs folding (kneading but oh so gently), proofing/leavening, shaping and baking. And I thought this would be easier! The bread better taste good Neville…..
Neville's sourdough spreadsheet for quantities for pre-ferment.
Here's another great sourdough blog Girl Meets Rye

Making sourdough with Simon Morton.
- Part 1: Making tasty sourdough bread at home
- Part 2: Getting started and making a sourdough starter
- Part 3: The science of sourdough
- Part 4: The pre-ferment
- Part 5: The prove & the bake
- Image gallery: Sourdough
Some excellent sourdough sites
- Susan's Wild Yeast Blog – she is a fantastic baker and her blog site is world-class.
- Northwest Sourdough
- The Fresh Loaf